
Taking my own advice and doing a kitchen renovation
/A lot of work, but finally a new kitchen that adds tens of thousands of dollars of value into the house.
by Ryan DaSilva
A few years ago, I wrote about home renovations -- the ones that will get you the best return on your investment. I said that one of the best things you can do is to renovate your kitchen. So heeding my own advice, my family took on a kitchen reno project this past summer! Here's a walk-through of the process we went through, with before and after pictures, to help you get an idea of what it might be like if you plan on doing a renovation.
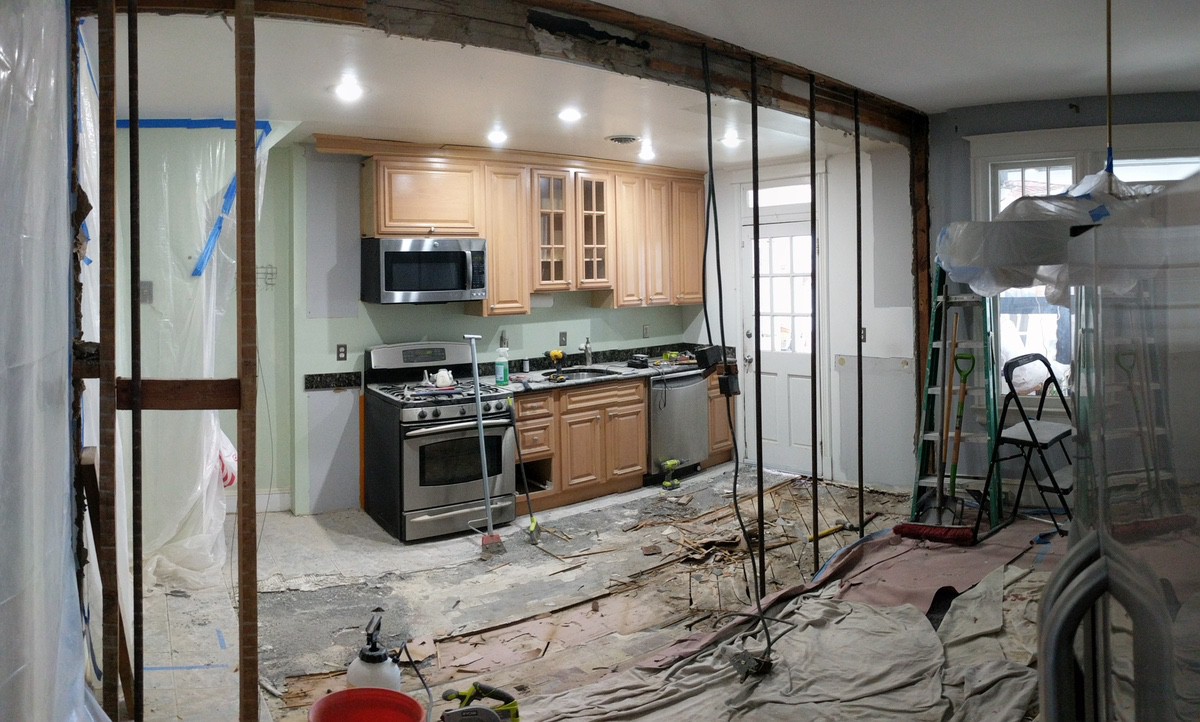
The kitchen in our interior rowhouse was your typical DC rowhouse galley kitchen - narrow and small. Even though it had been updated within the last 10 years (the previous owner even put in granite countertops and stainless-steel appliances), it needed more to accommodate our now family of five. We desperately needed more storage and a larger working space. The solution we went with would get us both things without completely breaking the bank.
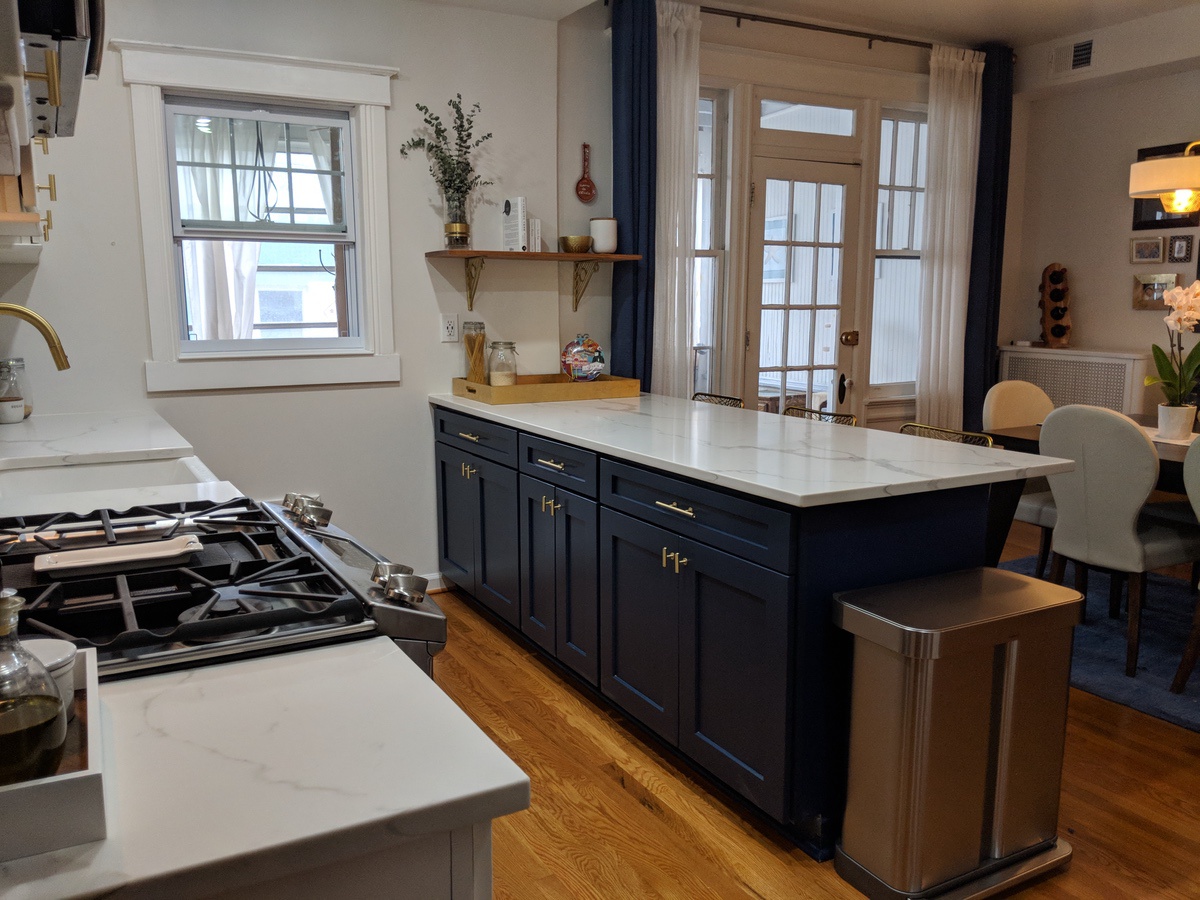
We removed the wall between the kitchen and dining room and closed off the walkthrough from the entry way to the kitchen, allowing us to add in a much-needed coat closet.
We knew we wanted the kitchen to be an open space but didn't want to take away from the home's original craftmanship. After years of touring and selling many Petworth homes, you get to see things that work and things that don't work. After years of seeing things in person and months of planning, we decided to keep the kitchen in the same location rather than moving it to the rear of the house where our sunroom is. This was both a financial decision, as it would have added almost $20,000 to the budget, as well as a design decision.
Once we decided to keep the kitchen in its location, it was now time to plan the layout. After much debate we decided to keep the sink and oven where they were (along the structure wall) and move the refrigerator to where the hallway entrance existed.
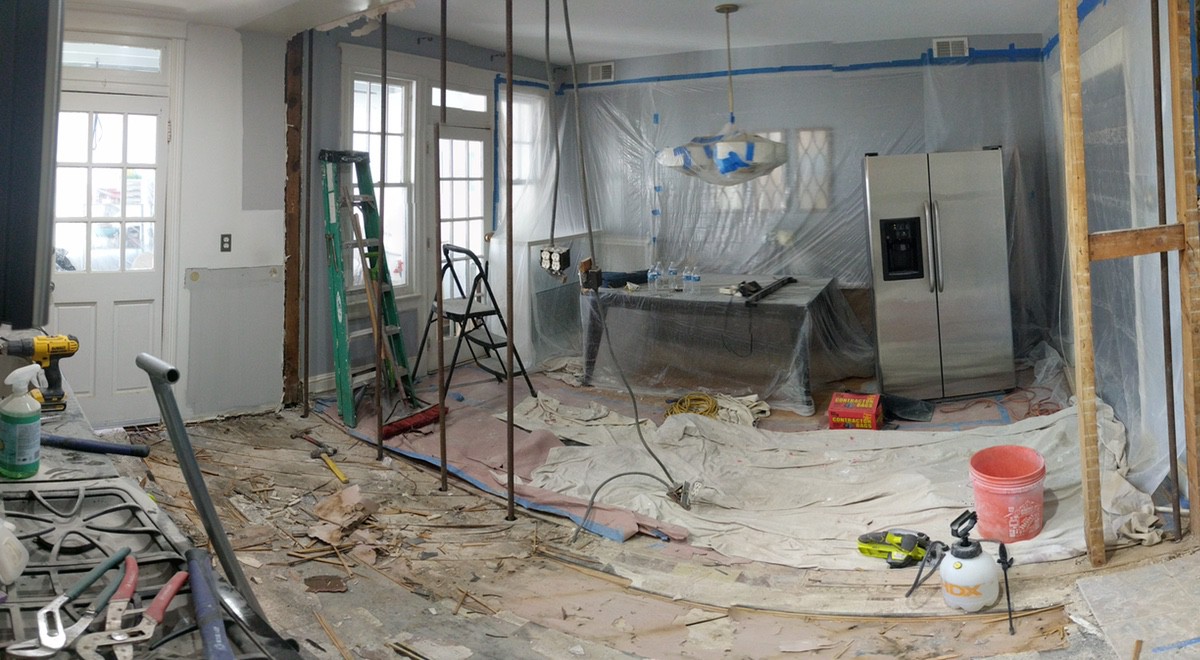
Walls coming down...
Time for demo!
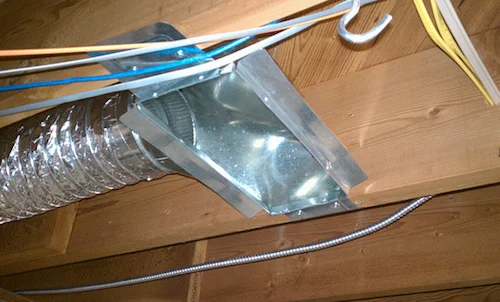
The first thing we did was remove the plaster wall, which separated the kitchen and dining room, knowing this was going to be the messiest of messy tasks. Next, we took up more than four layers of flooring from the kitchen. Once the flooring was removed, we exposed the structural wall by removing the existing drywall. It was important to see the existing electrical and plumbing, and we ended up finding some troubling stuff once that wall was opened: live wires, cabinets that were not anchored into the studs, just to name a few.
Luckily, we had accounted for new electrical and plumbing in our budget going in and were prepared to get all the electrical rewired to code, and replace the plumbing with new copper lines. And while we were at it, since the wall was exposed, we decided to put in the necessary plumbing for a future upstairs master bathroom project.


Once all the demo was complete it was time for framing. It was important to put in new framing so that when it came time to put in the new cabinets they had studs in the right locations and were properly secured. You really don't want to put up cabinets without anchoring them to studs, which is how our cabinets were previously hung.
After just over a week of framing, it was time for drywall. Once the drywall goes up you can really get a feel for what the space is going to look like. It took about a week to get the walls up and painted. Once that was done it was time to put in the new oak flooring. Since we were not going to be refinishing all of the hardwoods on our first level, we need to make sure we could get the new flooring to match the existing as best we could, which took some trial and error. We created a 4 x 4 square of the floor to use as a swatch and tested different stains. After about a dozen test runs, we found the right combination of stain – whew.


Finally, it was time to put up the cabinets. Since the studs were all marked and in the proper place, we were able to securely put up the cabinets in an afternoon. We decided to go with an off-white cabinet for the walls and a navy blue base cabinet for the peninsula. The day after the cabinets went up, the quartz countertops were delivered and installed along with the natural stone herringbone backsplash. It took us two days to put up the backsplash -- this was a miscalculation on my part. I ordered the right amount of material, but I didn't account for the cutting. All the small pieces that had to be cut to fill in the spaces at the bottom and top was much more than we anticipated. But when it was completed we were happy with the decision to go with natural stone.
The last thing to be done was to install hardware. We decided to go with a satin brass finish as it's making a comeback and keeps well with the era of our home.
Overall the project took ten weeks, one week longer than planned and $3,500 over-budget. All in all, we are very happy with the space.
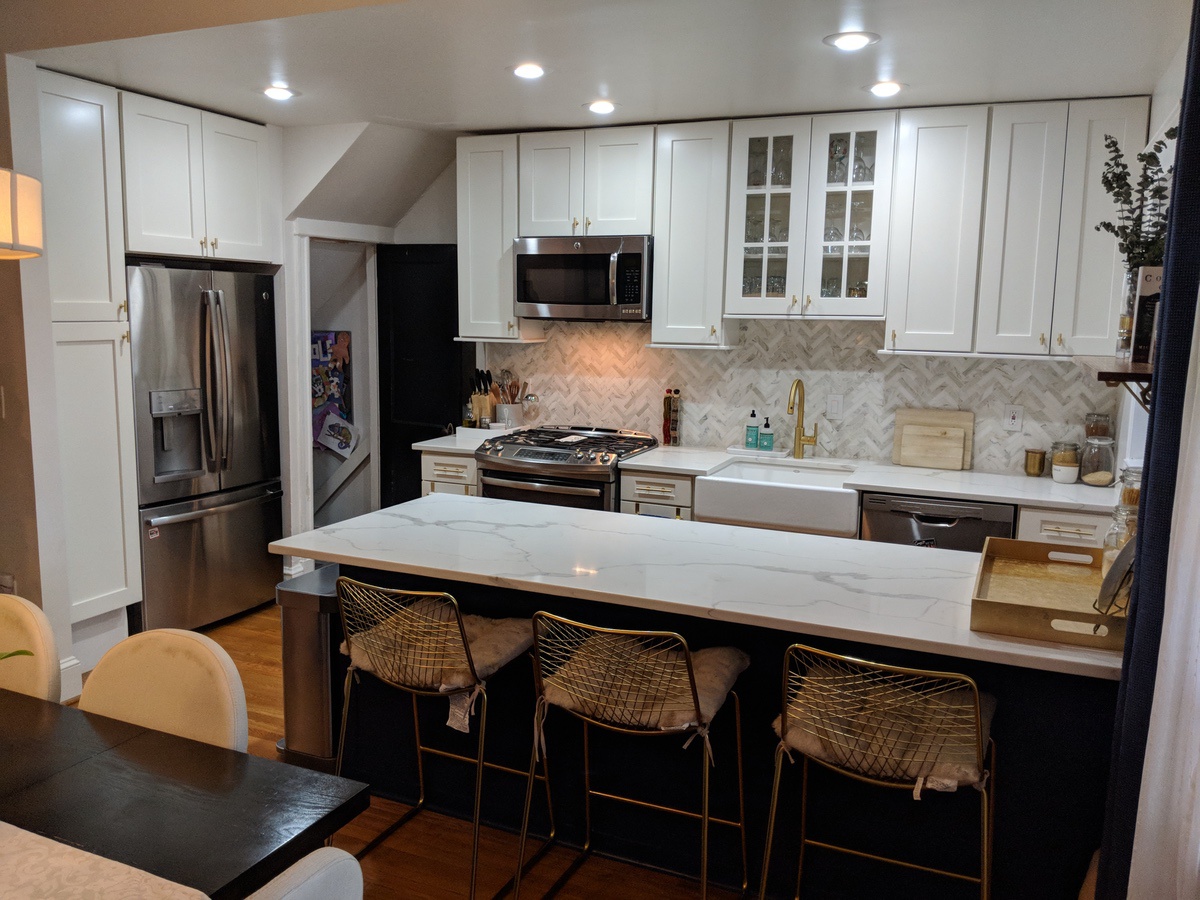
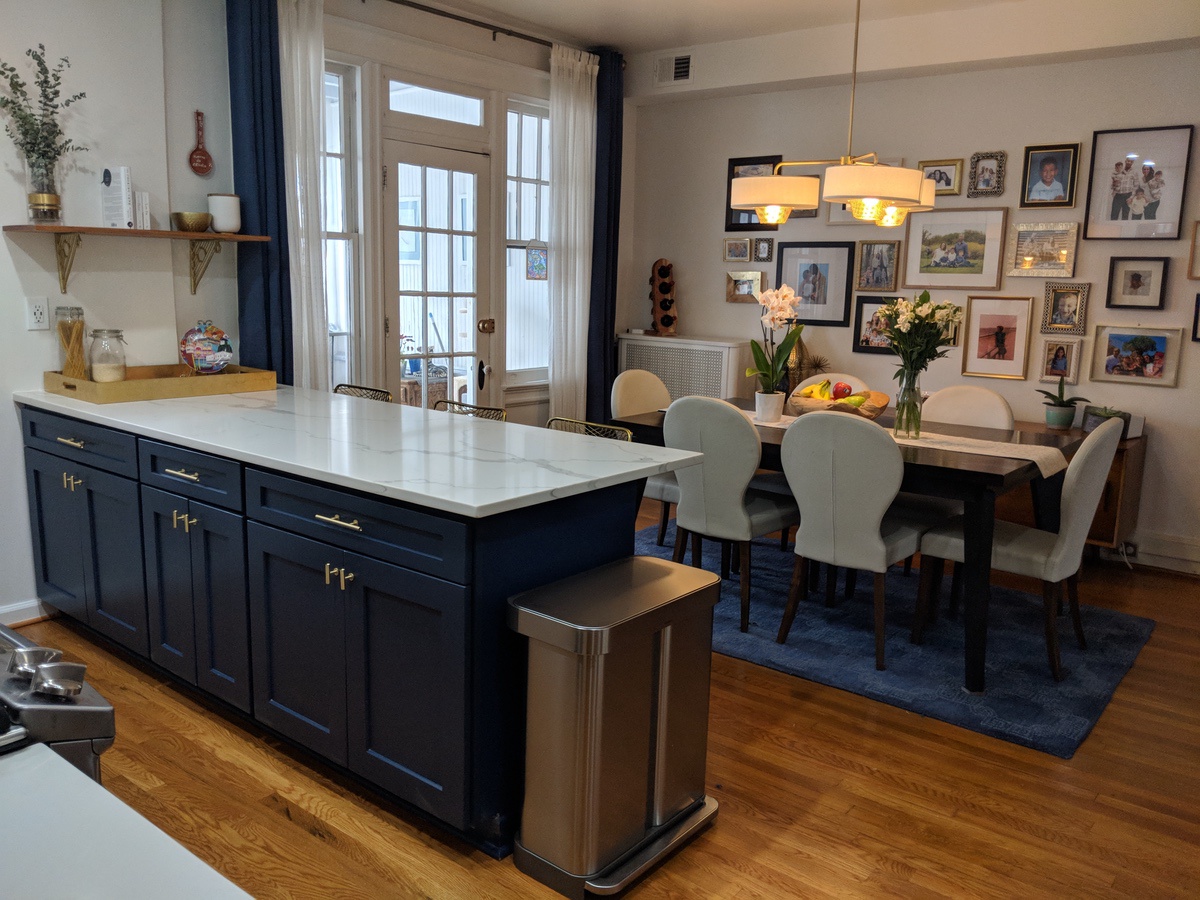


In total we spent about $42,000 on our project, but estimate that our new kitchen has increased the value of our home by at least $50,000.
What do you think?
Feel free to contact me with any questions!
Ryan DaSilva is a licensed Real Estate agent with Compass Real Estate, a contributor and a sponsor of the Petworth News blog. He lives on Farragut Street with his wife and three boys.
Related Articles by Ryan DaSilva